Configuration
The nopCommerce Admin AI ChatBot Configuration page controls the entire plugin. It is divided into three sections: First-time Setup, General Settings, Floating Bot, and OpenRouter Configuration.
First-Time Setup — Knowledge Base (required)
When you open the configuration page for the first time, you will see a Knowledge Base setup panel at the top. This must be completed before the AI can answer questions accurately.
The panel shows the sync status of three required components:
| Component | What It Indexes |
|---|---|
| Sitemap | All admin navigation pages so the AI knows where to direct you. |
| Settings | All nopCommerce store settings so the AI can explain and update them. |
| Service Dependencies | Which services consume which settings, enabling the AI to reason about side effects. |
Once all three are synced, the panel shows "All syncs complete." with green badges for each component. Click Open Knowledge Base to view or manage the indexed content.
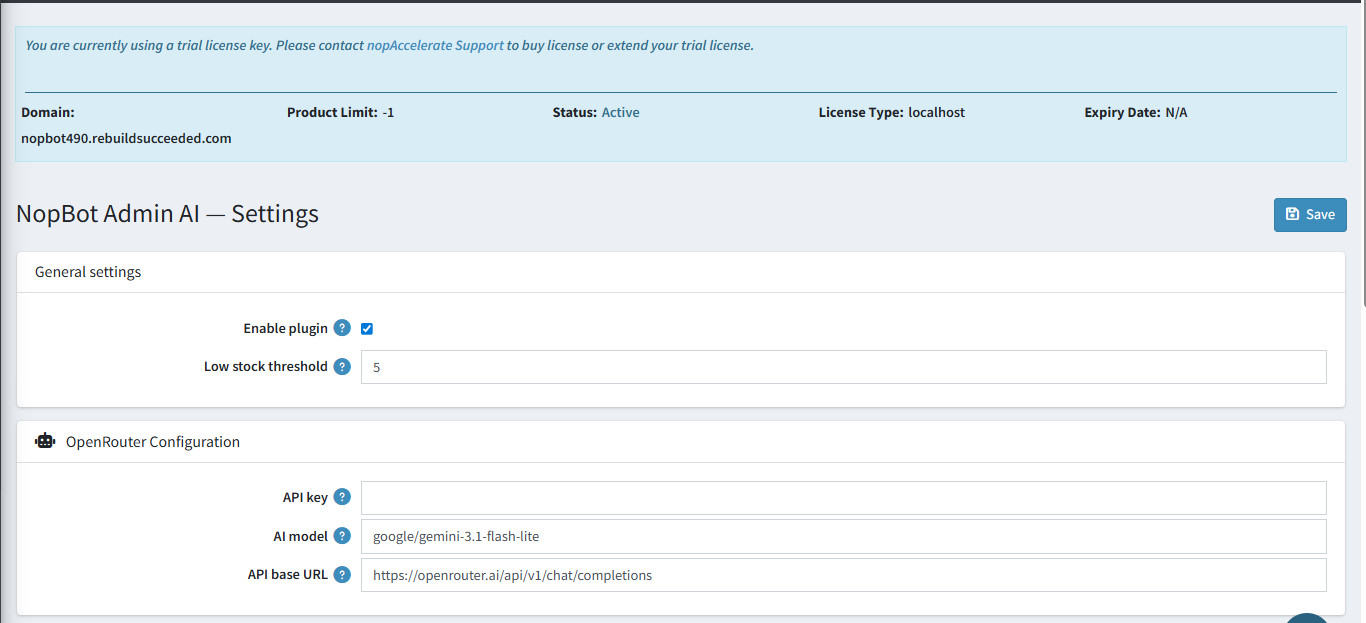
General Settings
| Setting | Description |
|---|---|
| Enable Plugin | Checked (ON) — Activates the plugin and the AI chat widget in the admin panel. |
| Enable Floating Admin Bot | Checked (ON) — Shows the floating chat button in the admin panel for quick AI access. |
| Low Stock Threshold | 5 — Products with stock below this value are flagged as low stock in AI responses. |
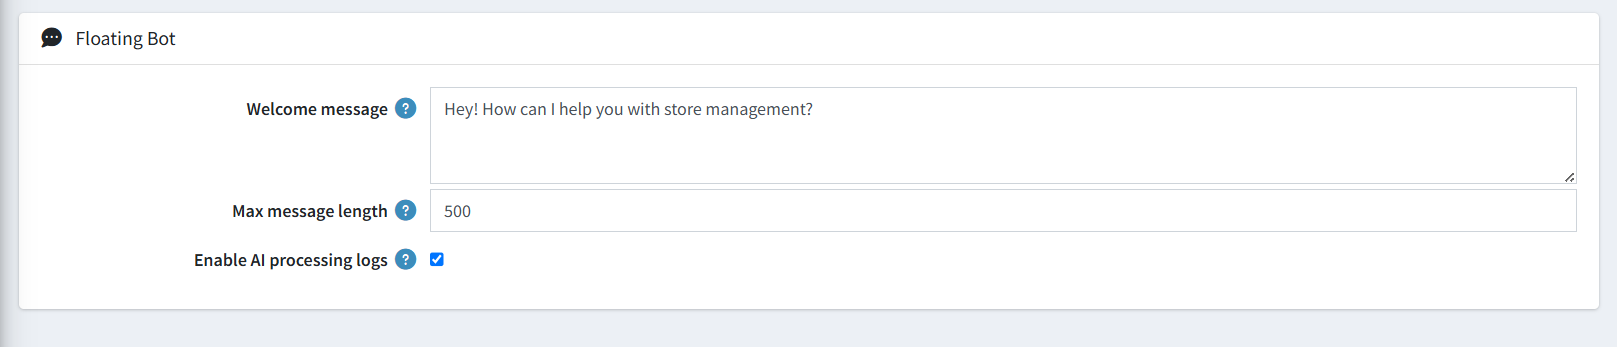
Floating Bot
| Setting | Description |
|---|---|
| Welcome Message | Hey! How can I help you with store management? — The first message shown when the chat is opened. |
| Max Message Length | 500 — Maximum number of characters a user can type in a single message. |
| Enable AI Processing Logs | Checked (ON) — Records every AI interaction to the AI Processing Logs page. |
OpenRouter Configuration
These settings connect the plugin to the OpenRouter AI service that powers all chat responses.
| Setting | Description |
|---|---|
| API Key | Your secret OpenRouter API key. Required for the AI to function. |
| AI Model | google/gemini-3.1-flash-lite — The AI model used to generate all responses. |
| API Base URL | https://openrouter.ai/api/v1/chat/completions — The OpenRouter service endpoint. Leave unchanged unless instructed otherwise. |
Note: After entering your API key and model, click Save in the top-right corner. The plugin will begin connecting to OpenRouter immediately.